
Step-by-step: how to create a physical mood board for your home
Step-by-step: how to create a physical mood board for your home
Getting the itch to decorate or change up your space? This time of year more of us than ever are giving our rooms a refresh or doing renovation work. But how do you make sure everything you’ve picked out is going to work together?

As much as we love a good Pinterest board, nothing beats having fun with physical swatches, samples and paints. This blog looks at what a physical mood board is, why interior designers use them, and how you can curate your own. Hold tight for an expertly styled space.
What is a physical mood board and why do interior designers do them?
A physical mood board is a collection of design samples that have been arranged together (often on a tabletop), to help interior designers curate an interior look. Interior design mood boards usually combine fabric swatches, tiles, flooring and paint samples, and any other decorative elements to help visualise what a room will look like when done.
How does a physical mood board help when designing a room?
We wouldn’t blame you for thinking a physical mood board sounds like more work than is necessary. After all, we’ve got access to loads of apps that can create digital ones for us in a flash. There’s a lot of interior inspiration out there, and you can easily get lost in the scroll.

If there’s one thing we’re big advocates for, it’s giving the hands-on approach a try. Physical mood boards allow you to slow down and really think about each individual aspect of the room, rather than getting distracted by multiple conflicting ideas.
The two biggest (and arguably most important) things in our interiors - colour and texture - can look very different on a screen. With a physical board, you’re able to see them in real natural light, as they would be in your home.
In short, a physical mood board is definitely one of the best non-committal ways to help make sense of what can be a really complex process.
How to create your own in 7 steps
Creating your own physical mood board doesn’t have to be difficult. Here’s how to nail it and give yourself some solid decor options.
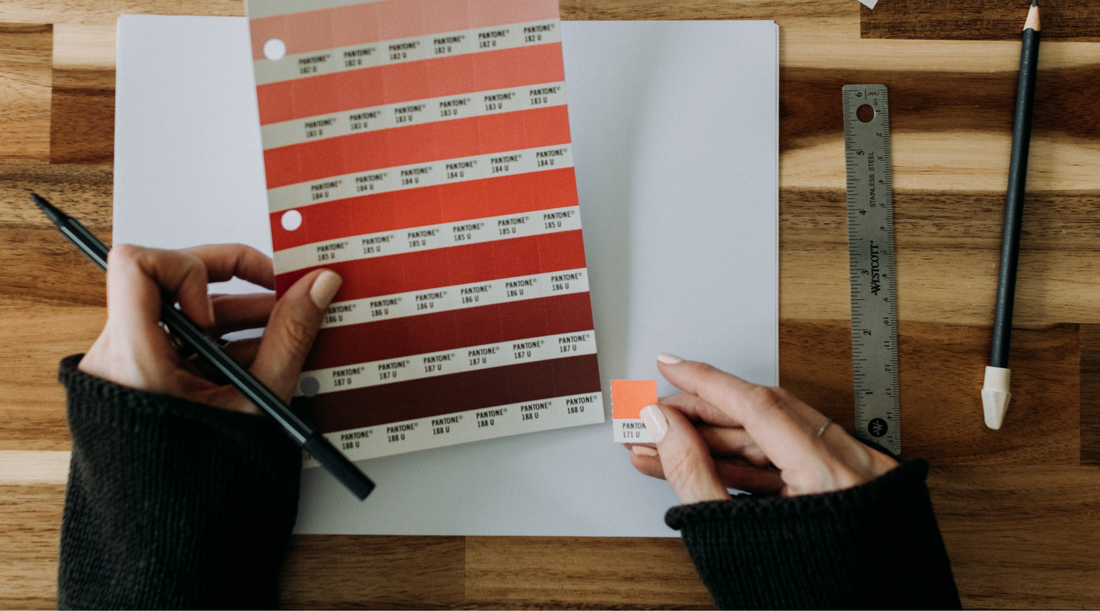
Step 1: source your swatches
First, it’s time to collect your samples. This can change, depending on what room you’re decorating, so it’s best to categorise by room type. For living rooms, order free fabric swatches to get ideas for sofas and chairs. If it’s a full makeover or renovation you’re planning, think about getting flooring and paint samples too.
Request a free sofa fabric swatch box from us here

At this stage, ask yourself if there are any decorative items you definitely want to include in the room - this could be anything from a vase to a favourite piece of artwork. Including these in your board from the get-go will help it stay on track. Now all you’ve got to do is wait for all of your samples to arrive.
Step 2: Prep your ‘base’
The clue’s in the name here. This is where you’ll need to choose a surface to create your board on. To keep things organised, use a cork board, shallow dining tray or affix samples to a timber board. Make sure you’ve got everything to hand based on what your samples are made of - staples, super glue, tape, etc.
Set yourself up a styling station in the same room you’re going to be decorating, if possible. This allows you to see what your samples look like together, in the natural or available light in the room itself.
Step 3: Start layering
Reminder: your interior decor mood board is a safe space. Remember, it’s all about experimentation, and the beauty of a mood board is the fact that nothing’s set in stone. The more you practice putting interiors together, the more natural you’ll feel and you’ll quickly build confidence in your decor decisions.

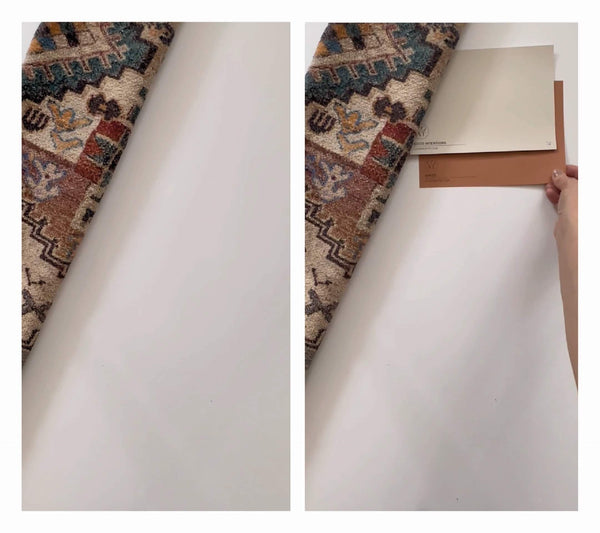
Start from the bottom up with any flooring ideas. Next, consider wall colours or details - paints, tiles, wallpapers, cupboard styles and the like. Next, layer over your textiles - sofa fabrics, curtains, rugs and other soft stuff. If you’re struggling to know where to start, place a printed inspiration image or your phone with the image on it in the centre of your board, and work around it. Find swatches from your collection that look similar, or visually complement this image. Easy, right?
Step 4: create your combinations
Keeping it simple is important. Interior design mood boards are all about seeing what goes together. This is why rooms styled by interior designers look great, as every element has been considered. Think about any existing parts of your room you want to keep. Perhaps you’ve got a coffee table you don’t want to part ways with, or you’re picking a sofa colour for an already painted room? If you’ve got samples of the existing items, even better.

Both colours and textures come into play here. Think about tones - does what you’re picking from your samples look like it would be at home in your hero image? Do you want a particular accent colour somewhere in the room? Where textures are concerned, the more variety, the better. Considering details like this has a huge effect on how well the final look will turn out, so don’t skip the small stuff.

This part is really helpful for honing in on the atmosphere you want your room to give off. Get some control over the feel of the room by considering what you want out of it. Perhaps it’s a cosy, cottage-like feeling, or maybe you’re into more of a sleek contemporary look. Don’t forget to refer back to your saved posts or Pinterest boards if you need to refocus on your interior style preferences.
Step 5: refine your boards
By now you should have a good collection of mood boards pulled together. At this stage, it’s a wise idea to take a step away from your carefully curated boards and come back later to take stock of it all with fresh eyes. Does anything about your interior mood boards jump out as not quite right? Are there any elements of the boards you’re not 100% loving? Is there anything that’s not actually practical for your space, or that’s going to be out of budget?

Step 6: photo time
Congrats - the hard part is done! If you want to, you can now stick and/or fix all of the sample groups down to your physical boards. Having a physical interior mood board is great for noticing how colours and textures look under different lights, or at different times of the day. Once you’ve got yours made, you’ll be able to check you still like the colour palette and textures, and that they’re going to work for your unique space.

Now it’s time to take photos of your boards. This is really handy to have in case you spot something you like the look of when out shopping for your home so you can have an on-demand mood board to reference, in your pocket. Create a flat-lay image by taking a picture from above, making sure to get all of the elements of your board in the frame. To take the best picture and give your board justice, bring it closer to a window, or turn up the lights in your home before taking photos.

And that's it - you're done! Use your mood boards as a reference whilst you create your interior look. Need more help with your decor decisions? Hit the links below.

What does a mood board consist of?
In interior design, mood boards consist of various physical elements of the room being designed. A mood board can consist of flooring, fabric, paint and hardware samples. Mood boards combine these elements to help interior designers visualise the final look.
How do you make a physical mood board for interior design?
To make a physical mood board for interior design:- Collect your samples
- Pick a base
- Use a photo for inspiration
- Layer your samples
- Audit what you’ve created
- Adjust and experiment
- Take photos for reference


